Twitter 132: Creating a Twitter Search Widget

[ratings]

In Thesis 33, I invited those interested in helping to spread the word about the #wristpain Twitter chat to

  1. retweet this: @mayoclinic: Know anyone with mystery #wristpain? Discuss a common cause Thurs on Twitter w/@RABergerMD http://bit.ly/dBlMH
  2. post to their Facebook and/or (if you’re really motivated)
  3. embed a Twitter search widget in your blog in a post on in the blog’s sidebar.

So I thought it would be good to give a step-by-step course on how to set up a Twitter search widget.

Note: This is one of the things you can’t do in WordPress.com, because the javascript is not allowed on WordPress.com blogs. You need to be using a self-hosted (WordPress.org) version, or a platform like Blogger or Typepad. One of the few downsides of the free WordPress.com platform.

So, here’s the step-by-step:

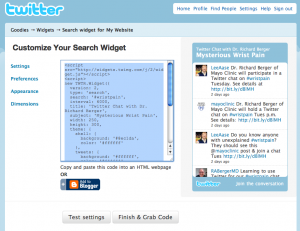
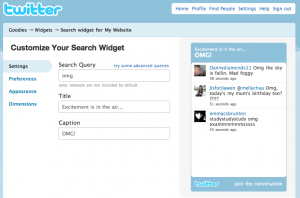
1. Go to the Twitter Search Widget page. You will see a screen like this (click any of the images to enlarge):

OMGsearch

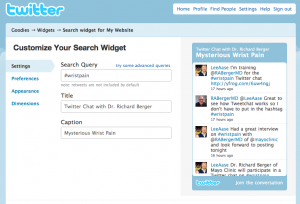
2. Since you don’t really want to display all of the Tweets using “OMG” in their body, you need to change the title and search criteria. Here’s what I did for my widget about the #wristpain Twitter chat:

Berger chat

3. You can adjust appearance and other settings if you want, but all you really need to do at this point is click the “Finish & Grab Code” button, highlight the code by clicking on it, and copy it to your clipboard.

Finish grab code

4. Go to your self-hosted WordPress blog (the process is similar for Blogger or Typepad) and either create a text widget for the sidebar, or a new post into which you want to insert your widget.

If you are doing a new post, be sure to switch from Visual to HTML view before you paste in your code:
HTML not Visual


Blogging 352: Adding an Email Subscription Form to Your Blog

Here’s an RAQ from Katie M:

I am currently using wordpress.org for a few blogs. I am setting up for some doctors and another blog for another pilot program … so doctors can learn from each other…I am wanting to have the similar option that you have for subscribing, that is via e-mail. How do I go about doing this?

The answer is pretty straightforward.

I recommend that you use Feedburner to replace your blog’s RSS feed with one that gives you more features, particularly better tracking. Feedburner is free, and among its built-in benefits is the ability to let your readers subscribe by email.

Here’s how you can add a subscription form to a sidebar widget on your blog, assuming you have set up a Feedburner account and “burned” your feed.

Continue reading “Blogging 352: Adding an Email Subscription Form to Your Blog”

Twitter 111: Twitter Badge on WordPress.com – Showing Tweets

In response to this post about how you can put a “Follow Me” Twitter badge on your WordPress.com blog, budgallant says:

that’s interesting, but definitely not at alternative to actually displaying the twitter updates…. what is up with wordpress? do they have a bias against twitter?

It’s not an anti-Twitter thing; it’s about WordPress.com stripping any javascript that you attempt to paste into one of its widgets. They say it’s a security measure, and I’ll take them at their word. I suppose if you have several million blogs on one server domain, you don’t want one with malicious code to bring the whole platform down. So the easy way out is to not allow anything but straight HTML in sidebar widgets.

Thankfully, there is a way around the problem, that lets you both have a badge people can click to follow you, and also display your latest Tweets.

badgeandtweets

You do the first part by following the instructions I had in the previous post.

Putting the latest Tweets in is actually easier, because Twitter provides an RSS feed that you can pull into an RSS widget in WordPress.com.

Continue reading “Twitter 111: Twitter Badge on WordPress.com – Showing Tweets”

RAQ – Related Posts

In the comments about my post on Malcolm Gladwell’s Outliers, Peggy Hoffman asks:

Question (and yes great book) can you share with us how-tos on the related post widget you are using here that produces automatically generated material.

It’s really easy. In your WordPress dashboard (and I’m glad I’ve waited until WordPress 2.7 was released before I did my overview of the dashboard for Blogging 111; that’s coming soon), you click on the Appearance link on the left side:

picture-14

And then choose Extras:

picture-15

At which point you will see a set of options like this:

picture-131

All you need to do is make sure the last option, “Hide related links on this blog, which means this blog won’t show up on other blogs or get traffic that way” is unchecked.

So, on WordPress.com, having the automatically related links is the default option, I believe. You can decide you don’t want to have it, but as Peggy points out, it can be really helpful to your readers.

They are automatically generated, so they aren’t guaranteed to be related, but on balance I think this is a good option. I’m sure some SMUGgles found their way to our University originally because of a possibly related link on someone else’s WordPress.com blog.

If that’s your story, I’d love to hear from you in the comments. Please let us know if the automatically related links helped you discover SMUG. That will help our fellow SMUGgles see the value of this feature as well.

While I was doing this post I saw another feature that has no useful point, but I’m turning it on just for effect. Let me know what you think of the falling snow. Only available on WordPress.com, and only until 1/4/09.

Social Media 111: Customizing Your iGoogle Page

In Social Media 102 we introduced you to RSS, which is a powerful way for you to keep tabs on what’s new in dozens (if not 100 or more) of Web sites and blogs that provide RSS feeds. Instead of having to go to the sites, you can use Newsgator or NetNewswire or Google Reader, and have the updates sent to you.

iGoogle is an alternative that enables you to embed what Google calls “gadgets” featuring the latest content from your favorite sites, all on a single page. It lets you, in effect, create a simple, free blog monitoring dashboard.

I recently heard that Yahoo! said as many as half of all MyYahoo! users never customize it from the default settings. I expect that may also be true of iGoogle. That’s why I made this video screencast, to show just how easy it is to customize iGoogle, to have the latest posts from the key blogs you’re monitoring available to you with a single click.

[youtube=http://www.youtube.com/watch?v=9B7u49Ky_oo]

Homework Assignment:

  1. Sign into your gmail account (or get one if you haven’t yet)
  2. Go to iGoogle.
  3. Click the “Add Stuff” link (on the right side), and then the “Add feed or gadget” link in the left column.
  4. When the box pops up, paste in a URL from any blog post. If you like, for example, you could use this one: https://www.social-media-university-global.org/2008/10/27/smug-reading-list-102708/ then hit the “Add” button.
  5. When you get the confirmation that the feed has been added, click the “Back to iGoogle Home” link, and you will see that the gadget containing this RSS feed has been placed in the upper left corner of your page.
  6. Repeat the steps for each blog you want added to your monitoring dashboard.

Please note that while iGoogle lets you just enter the URL from a single blog post, and figures out the related RSS feed you want to monitor, you also can paste in the URL from an RSS feed in step 4. So, for example, I did a Blogpulse search for posts mentioning “Mayo Clinic” and got this URL:

http://blogpulse.com/rss?query=%22Mayo+Clinic%22&sort=date&operator=

Which I pasted into a gadget and now it sits on the front page of my iGoogle.

Please note also that you can edit the number of feeds that go into your gadget, increasing to up to 9:

This will be most helpful for those feeds (like Blogpulse or Technorati searches on keywords) for which you expect more frequent updates.

Alltop has several pre-configured pages like this, as described in this post. But you can’t tailor those. You can configure iGoogle to exactly meet your needs, though, and as our SMUG motto says:

It’s Not That Hard!